Photo To Canvas!
Your beautiful digital photos will become amazing art on canvas!
Going from photo to canvas is one of the fastest growing home and office decorating ideas for wall art.
It's simply using today's technology with your own digital photos!
You've just been to an exotic place, enjoyed a family reunion, or just snapped a few pictures of those flowers around your house. With the advanced printing processes available to us today, you can now enjoy your own great photos on the walls of your home or office... everyday!
 |
 |
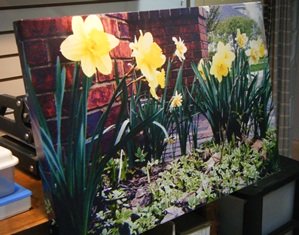
A photo to canvas example...
A while back, I was on a hunt to find something bright, colorful, and "happy" to put on one of the walls in my office. In my mind, it needed to be bright with sunshine because there is just something about sunshine that brings joy to my day!
I decided to look through some of the digital photos that I have stored on my computer. You know, those shots you took because you were inspired at that "moment"? (I had plans to do something creative with them when I took them, but hadn't got around to it yet.)
There it was! I found a great image that could easily go from photo to canvas. The photo contained some bright yellow daffodils glowing in the sunlight just outside our front porch. It was just what I was looking for!
I made arrangements to have my digital photo professionally printed on artist quality canvas. (read below for complete advice and help to do this!)
When it arrived, I was amazed at the results! The texture of canvas together with the printed image turned out better than I could have imagined!
Now I really enjoy having it to look at during those occasional cloudy gloomy days...it just lifts my spirit! It has been admired by many people stopping by for a visit, it is really eye catching!
Now they want to know how to convert their photo to canvas! It's not hard, just a few things to keep in mind.
Getting your photo to canvas processed!
For amazing professional results, Prints & Frames! does a great job!
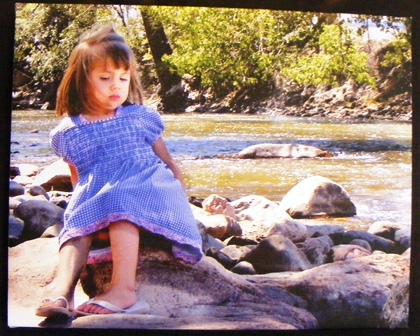
 Find a digital snapshot of what you want to put on your wall... |
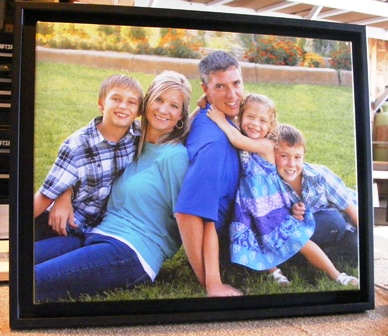
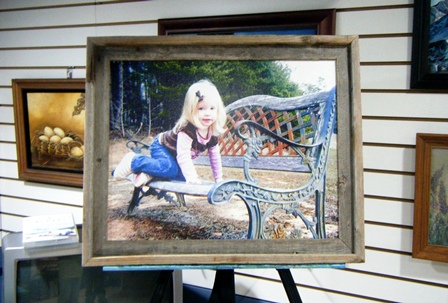 From photo to canvas...I framed this one! |
The actual procedure been fine tuned over the years and with the latest technology, has become almost a common place process today!
The majority of the inks used are manufactured by either Canon or Epson. The two types are either water soluble or solvent based. Water soluble is the popular choice for canvas or paper printed art, solvent inks are primarily used in advertising media such as for outdoor use.
The pigmented inks and and the artist quality canvas or paper used for photo to canvas printed art work is highly archival and UV protected...it is estimated that these prints will last up to 200 years (depends on who you talk to). But even with that in mind, it is not advisable to display in direct sunlight for a long period of time - natural fading could occur.
Following the printing and time for the ink to dry, a laminate coasting is applied with rollers. This adds another layer of UV protection, and makes the canvas print cleanable, smudge resistant, and water proof. It is then ready for stretching onto a frame and then hung on a wall.
With all of these great professional industry standards, how can we go wrong?
Probably the most important item you need to decide when you order your print is to know what size you what the finished wall art to be. The company you order from will have guidelines or suggestions to accomplish this for you, but here is the general rule to follow:
Use the highest resolution image you have available. I've learned (the hard way) to always take pictures at the highest setting on my camera.
The higher the resolution the greater choices you will have for print size and a better quality of detail. Most companies have capabilities to work with any image you may have, but you could be limited on the final size if the image resolution is low. If your image is taken with a 3 megabit or greater camera (even the camera on your phone), you should have good results.
 |
 |
Preparing your photo to canvas printing!
Depending on the quality of the digital image you have, you could spend a few minutes tweaking it using photo imaging software.
For the simplest and less technical process, you can use any photo editing program such as Microsoft, Picassa, or any number of other free image editing programs found on-line. If you have never done this before, use the help topics provided with the software.
You'll want to do at least four things to the image:
1). Crop it (remove unwanted areas). The most common adjustment is simply cropping it to focus on just what you want, without any unnecessary distractions.
2). Auto-correct the color. Photo imaging software comes with preset color auto-adjustments that work great! You probably won't need to do anything more to the color.
3). Auto-correct the lighting. Same as for color, there are preset auto-lighting adjustments with your software that will normally take care of balancing the light. If you are comfortable with additional tweaking, just set it to what looks best to you.
4). Size it. Decide how big of a canvas you want on your wall. Hint: usually larger is better for the greater impact. It may cost a bit more, but you will be much happier with the outcome. See my article on Large Prints.
Just a few more decisions to make, then you're ready!
There are several ways to have your image printed on canvas and mounted for display on your wall. Here is the terminology you will encounter:
Gallery Wrap: This is a favorite for many people and adds a nice dimensional look to your finished art. The process is to have it stretched and mounted on 1 1/2 inch wide stretcher bars. These are solid sticks of wood cut to size, and then assembled. The canvas print is then stretched and fastened on the back.
Museum Wrap: Same as description for gallery wrap but usually a smaller thickness stretcher bar is used, such as 3/4”, 7/8” or up to 1 inch.
Flat Mount: The printed canvas is flat mounted to a Masonite type board. These would then be framed in a conventional frame without glass.
When choosing either gallery wrap or museum wrap, you'll need to decide how you want the edges printed:
Mirror Wrap: This choice has an additional printed edge boarder added to the dimensions of the image that will wrap around the stretcher bars. It gets its name from the process of "mirroring" the edges so the final art looks like it continues around the edge. This is the most common choice and creates a great finished masterpiece that can hang as is!
Image wrap: Also called an “extended image”. In this process, the original image is enlarged to accommodate the wrap around the stretcher bars. Since a part of the original image is being wrapped around the bars, the image that you see on the face of the canvas is slightly reduced – it is similar to cropping. Part of the image is "lost" to the sides of the bars.
Colored Edges: One more choice is to have the edges be a solid color. The color is compatible with the image as it is usually picked from the image itself. Like the mirrored wrap, the dimensions for the additional boarder is added so the image you see will still see the entire photo.
Some final considerations to think through:
Triptych or Multi-image: This is simply taking a photo such as a panoramic image and dividing it into three (or more) separate images. these are very popular because of the eye appeal and the ability to span a larger space. Normally the company you are using for the printing will do the split for you, but feel free to do it yourself.
Framed: Stretched canvases can be framed with traditional frames or with a float frame (see above image). It is called "float" because of the way the frame surrounds the picture without touching the sides - there is a gap between the frame and the canvas. This creates a very pronounced display and is a favorite for wrapped canvas prints.
Un-framed: Simply takes the photo to canvas and stretches it around the stretcher bars, fastened, and then hung on the wall. Also very popular and less expensive than having a frame added.
Have a photo you want to hang on your wall?
Consider any digital images you may have. These really do make great wall art items. They are very personal and have a story to tell...yours!
You can have these on your wall fairly quick and inexpensive!
If you need help making this happen, I have a great working relationship with a professional printer that has been doing this for years. He has all the latest equipment and specializes in professional quality work.
After the printing process is complete, I will professionally stretch and mount it and even frame it for you. Just let me know!
Here's a link to my business web site: Prints-n-Frames!
I would be glad to help you put your favorite photo to canvas and onto your wall!
Check Out The Great Ideas Others
Are Sharing With Us!
Show us YOUR latest and best canvas print!
You'll get get rave reviews and help others here!
Best Canvas Prints Made From Favorite Photos!
Do you have a favorite photo of yours that has been made into a beautiful canvas print?
Please share with us! We would love to admire and learn from your example!
Take a picture of your canvas-printed-wall-art and share it together with your story about it!
Why is it special? What size and how did you have it mounted? Where is is hanging? Any special reactions from others that have seen it?
(Note: If you have more than one, please make multiple submissions - thanks!)
Return to top of page: Photo to canvas Return to Home Decorating Ideas.
New! Comments
Have your say about what you just read! Leave me a comment in the box below.